One of the key aims I bought Raspberry Pi in the first place was to create a Beowulf cluster. With this aim I had purchased 3 Raspberry Pi3. Now any such setup as a cluster will need some effort and planning and hence I planned to start with a Dask Cluster.
What is Dask?
Dask is a flexible parallel computing python library for analytic computing.The link to the project is http://dask.pydata.org/en/latest/. It helps to easily process large data sets with focus on lazy compute and Dask represents parallel computations with task graphs. One of the key features that I wanted to explore was the dask distributed scheduler. Dask can scale to a cluster of 100s of machines. It is resilient, elastic, data local, and low latency and it achieves so using Dask distributed scheduler. More on this later.
Exploring Jupyter
Also I wanted to use Jupyter notebooks which has a host of features that can help me to run many of my data analysis experiments on Raspberry Pi using a browser, Also open Virtual Terminals using web browser and save the python code, documentation and the results at the same place. You can explore more about Jupyter Project & Jupyter Notebooks at http://jupyter.org/Why Python 3?
And finally Python 3, during the past week or so I am reading many blog posts and social messages which are talking about the "end of life" of Python 2 & 2.7 by 2020. This weekend experiment was the perfect opportunity to transition to Python 3 and I found many good aspects which makes me confident that I will stick with Python 3 as I explore Python more. One of the simple reasons why I would transition is because it handles Unicode naively and hence there is no hell of the exceptions of Unicode character while decoding to ascii which was a constant problem in Python 2. Also most of the important python libraries are already providing python 3 support.The physical setup
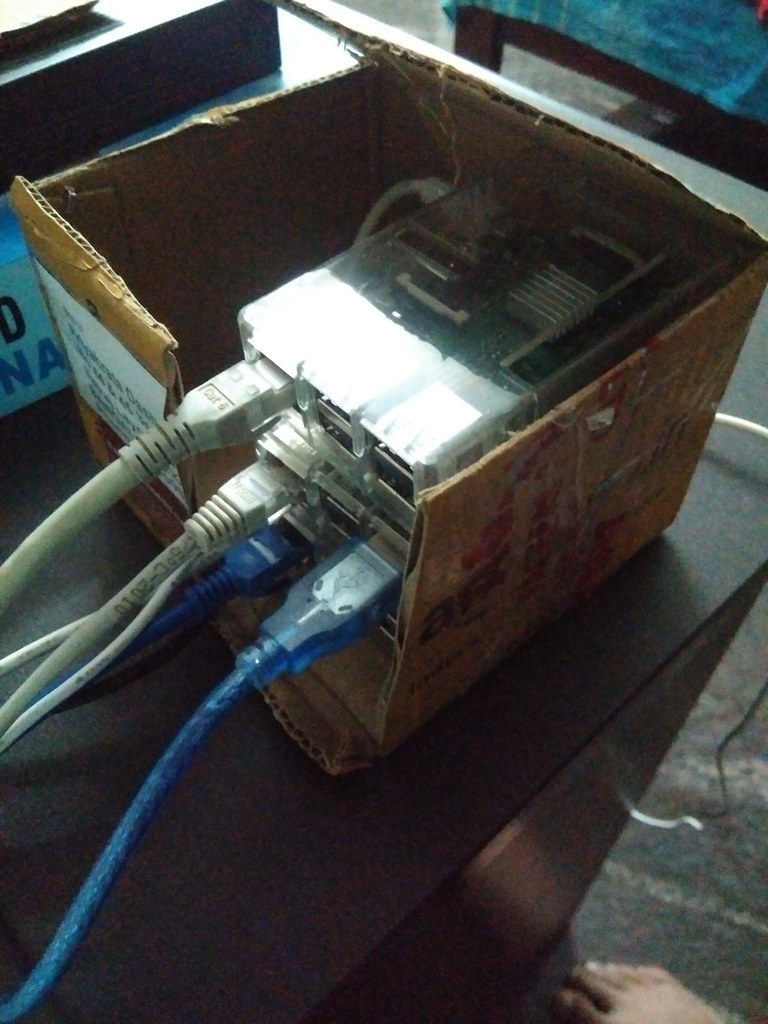
Setting up for fast data transfer was one of the most important aspect of my experiment. For set all the Raspberry Pis in a cardboard box and connected then via LAN cable to my Router. This has not only improved the stability of the network connection but also has provided with constant IP addresses without me doing any static IP changes to my network interface. I know this may change but for the weekend it was quite fine and never an issue.
Setting up Python 3 & Jupyter
For this I took the help of jns project (https://github.com/kleinee/jns) . Most of the steps that I given below are from the Readme of the project with few changes.Requirements
- a Raspberry Pi 2 or 3 complete with 5V micro-usb power-supply
- a blank 16 GB micro SD card
- an ethernet cable to connect the Pi to your network *)
- an internet connection
- a computer to carry out the installation connected to the same network as the Pi
- a fair amount of time - user feedback suggestst that a full installation takes in the order of 6 hours...
Since I already had Raspbian installed image on my Raspberry Pis, I went ahead with the rest of the software setup.
Make sure pandoc and git is installed
sudo apt-get install -y pandocI created jns user which will be the primary user for our Jupyter setup
sudo apt-get install -y git
sudo adduser jnsI downloaded the scripts from its github repo to all the 3 Raspberry Pis:
sudo usermod -aG sudo,ssh jns
git clone https://github.com/kleinee/jns.gitOne of the key issues which I faced early on was that I had Python 2.7 already installed as part of Raspbian and hence in these install scripts when I ran them I found that they were installing Python 2.7 version of the libraries instead Python 3.6. The main reason for this was because pip command was pointing to Python 2.7. Hence to fix the issue I update the sh scripts to replace pip with pip3 which the default package manager for Python3.6.
cd jns
chmod +x *.sh
sed -i -- 's/pip/pip3/g' *.shFinally I ran the below command to do the full installation
sudo ./install_jns.sh
This will create a directory notebooks in the home directory of user jns, clone this repository to get the installtion scripts, make the scripts executable and then run install_jns.sh which does the following:
- install Python
- install Jupyter
- (pre)-configure the notebook server
- install TeX
- install scientific stack
Note: In case you face issues of compiling matplotlib or sicpy I suggest to redo the installation or refer the github readme. As this helped me to resolve all the installation issues.
Install dask and its distributed framework dask.distributed
pip install dask[complete] distributed bokeh --upgrade
This will install:
- Core libraries and parallel processing engines for Dask
- Pandas
- s3fs to talk to Amazon s3 object storage
- hdfs connector
- Dask.Distributed library to talk to Dask distributed scheduler
To make sure Dask executable would point to Python3 I made changes to the following scripts:
/usr/local/bin/dask-remote
/usr/local/bin/dask-submit
/usr/local/bin/dask-scheduler
/usr/local/bin/dask-worker
/usr/local/bin/dask-ssh
To the following scripts where I pointed the python version from /usr/bin/python to /usr/local/bin/python3.6
/usr/local/bin/dask-remote3
/usr/local/bin/dask-ssh3
/usr/local/bin/dask-submit3
/usr/local/bin/dask-scheduler3
/usr/local/bin/dask-worker3
Finally once installation completed the output looked like below under /usr/local/bin
pi@raspberrypi:~ $ ls /usr/local/bin
2to3 ipython3 python3-config
2to3-3.6 isympy pyvenv
cygdb jp.py pyvenv-3.6
cython jp.pyc rst2html5.py
cythonize jsonschema rst2html5.pyc
dask-remote jupyter rst2html.py
dask-remote3 jupyter-console rst2html.pyc
dask-scheduler jupyter-kernelspec rst2latex.py
dask-scheduler3 jupyter-migrate rst2latex.pyc
dask-ssh jupyter-nbconvert rst2man.py
dask-ssh3 jupyter-nbextension rst2man.pyc
dask-submit jupyter-notebook rst2odt_prepstyles.py
dask-submit3 jupyter-qtconsole rst2odt_prepstyles.pyc
dask-worker jupyter-serverextension rst2odt.py
dask-worker3 jupyter-troubleshoot rst2odt.pyc
easy_install jupyter-trust rst2pseudoxml.py
easy_install-2.7 pip rst2pseudoxml.pyc
easy_install-3.6 pip2 rst2s5.py
f2py pip2.7 rst2s5.pyc
f2py3.6 pip3 rst2xetex.py
idle3 pip3.6 rst2xetex.pyc
idle3.6 __pycache__ rst2xml.py
ipcluster pydoc3 rst2xml.pyc
ipcontroller pydoc3.6 rstpep2html.py
ipengine pygmentize rstpep2html.pyc
iptest python3 runxlrd.py
iptest2 python3.6 runxlrd.pyc
iptest3 python3.6-config vba_extract.py
ipython python3.6m vba_extract.pyc
ipython2 python3.6m-config wheel
And finally for the jupyter to run as a backend process on startup I added the following script:
$ sudo cat /home/jns/runjupyter.sh
DAEMON=/usr/local/bin/jupyter-notebook
DAEMON_ARGS="--config=/home/jns/.jupyter/jupyter_notebook_config.py"
nohup $DAEMON $DAEMON_ARGS >> /tmp/jnsexec.log &
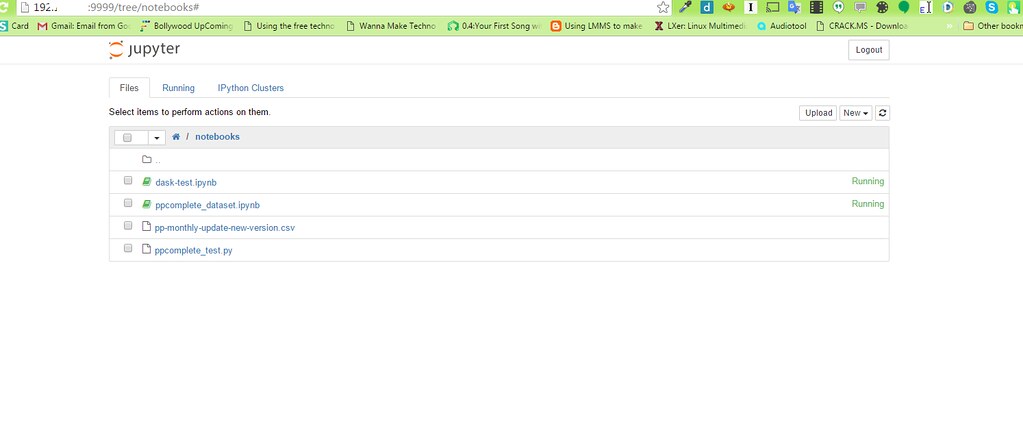
And added this line to crontab so that this only gets started on reboot, plan to develop an init script is in progress.And finally after rebooting my Raspberry Pi I got the below screen:
jns@minibian:~$ crontab -l
@reboot sh /home/jns/runjupyter.sh
All this setup took me on all the three notes with Jupyer running on one of the nodes took me about 1 day and quite intensive. Anyone trying the same I wish them luck.
In the next post I will explain more about the Dask Distributed cluster and my experiments on it.


Thanks a lot for taking the time posting about your setup. Looking forward to part 2. I will take a look at the issue that you ran into and fix scripts and Readme so that others don't. Thanks for your contribution - Eckhard Kleine (@kleinee)
ReplyDeleteI like the article. Thanks for posting.
ReplyDelete