Saturday, December 31, 2016

Raspberry Pi Experiments - Setting Samba Network File Sharing


First of all Happy New Year to all. In this new post I will be focusing on how to convert  Raspberry Pi to a network file server.

For this I used the instructions from http://raspberrywebserver.com/serveradmin/share-your-raspberry-pis-files-and-folders-across-a-network.html and I am happy it worked.

In my previous post http://priyabgeek.blogspot.in/2016/12/raspberry-pi-experiments-file-server.html I had talked about attaching my Hard disk to raspberry pi and accessing files via a web server. While discussing this over Facebook I got a comment to use samba as a file server. Though I knew about it but was not sure how easy it is to set up.

So here are the steps I followed to setup samba in my Raspberry Pi 3.
1. Download the samba binaries
sudo apt-get install samba samba-common-bin
 In case you face issues please type sudo apt-get update and do the above step again for the installation to take place.

2. Take backup of /etc/samba/smb.conf
sudo cp /etc/samba/smb.conf /etc/samba/smb.conf.bkp
3. Edit /etc/samba/smb.conf to make the necessary changes for network sharing
sudo vi /etc/samba/smb.conf
4. Please find the below options and make the necessary changes:

# Change this to the workgroup/NT-domain name your Samba server will part of
   workgroup = WORKGROUP

# Windows Internet Name Serving Support Section:
# WINS Support - Tells the NMBD component of Samba to enable its WINS Server
#   wins support = no

   wins support = yes
5. Also add the path that you want to share. In my case I wanted to share my mounted External hard drive. I added this part to the end of the file /etc/samba/smb.conf
[filedrive]
   comment= FileDrive
   path=/mnt/usbdrive
   browseable=Yes
   writeable=Yes
   only guest=no
   create mask=0777
   directory mask=0777
   public=no
 6. Mounting the hard disk
sudo mount /dev/sda1 /mnt/usbdrive/

7. Set up a samba password for pi user
sudo smbpasswd -a pi 
 8. Finally access the samba server from windows.
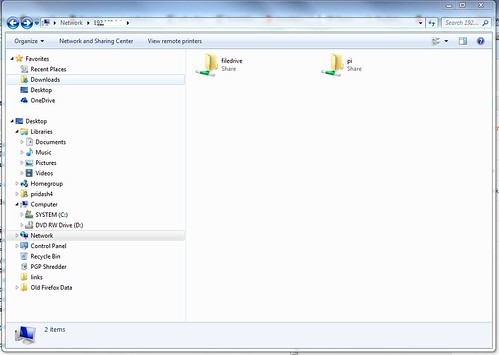
SambaServer 

Hope this short post is helpful to you  as it was to me.
Monday, December 26, 2016

Raspberry Pi Experiments - File Server using Hard Drive


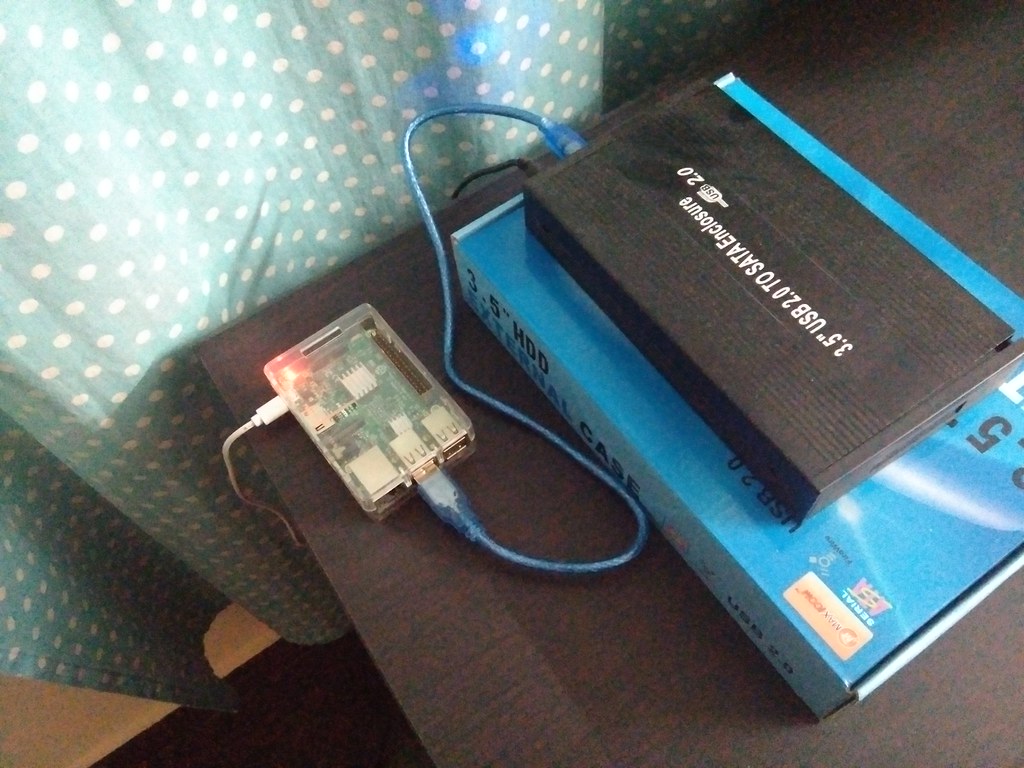
IMG_20161226_230403


For long I wanted to host a cloud file server for my needs. As my file collection was growing bulky and taking a lot of space on my laptop and on my wife's hard disk. It was absolutely necessary that I would have to buy a external hard disk. There were two features that I wanted in my cloud file server solution.
1. To be hosted from my home
2. To be accessible from any place

For point 2 I restored to opening a ssh tunnel from home Raspberry Pi to my AWS instance. For more details check my blog http://priyabgeek.blogspot.in/2016/08/raspberry-pi-experiment-ssh-reverse.html

Having read about the how a hard disk can be connected to Raspberry pi and can be mounted like in any other linux system I got a Seagate 2 TB SATA Barracuda 3.5" internal Desktop Hard Disk - ST2000DM006 from eBay and got a local 3.5 Inch USB 2 Hard disk case. The important thing here is that I used a Hard disk case with external power supply as this is important because the Hard disk can not work by taking current from Raspberry Pi via USB. And with Barracuda hard disk I also got an external fan which really made it a great deal as now I do not have to worry of cooling the hard disk. Now the tricky part was the USB connector. The case did not have one but the compatible USB cable that comes with Arduino UNO did work well and after connecting did not have any issues.

Now coming to the commands that I used to setup the file system.

First check if hard disk is detected
pi@raspberrypi:~ $ lsusb
Bus 001 Device 004: ID 152d:2329 JMicron Technology Corp. / JMicron USA Technology Corp. JM20329 SATA Bridge
Bus 001 Device 003: ID 0424:ec00 Standard Microsystems Corp. SMSC9512/9514 Fast Ethernet Adapter
Bus 001 Device 002: ID 0424:9514 Standard Microsystems Corp.
Bus 001 Device 001: ID 1d6b:0002 Linux Foundation 2.0 root hub


If you detect a SATA Bridge driver it means your disk is detected.


Though there are known issues with NTFS on Raspberry PI and Raspbian I chose the file system because of the sheer portability and support I can get out of NTFS as a network files system which I did not expect out of a fat32 file system because of its formatting issues and its max 2gb limit for the file size. The issue with ext4 or similar linux file formats is that they are not supported natively on Mac or Windows. Hence I went ahead with NTFS as the file system for my external hard disk.

List your file systems:
sudo fdisk -l 
Device     Boot Start        End    Sectors  Size Id Type
/dev/sda1        2048 3907029167 3907027120  1.8T 83 Linux


Before formatting unmount the USB drive to be safe:


sudo umount /dev/sda1
For more clarity on the disk used and partition details I use test disk which can be installed as given below:


sudo apt-get update
sudo apt-get install testdisk
Launch testdisk command as given in the below screencast:


sudo testdisk


Now we need to install the ntfs drivers:

sudo apt-get install ntfs-3g

After installing it we can format the hard disk as below

sudo mkfs.ntfs /dev/sda1 -f -v -I -L disk-name 

We can check the disk details using the command:

pi@raspberrypi:~ $ sudo blkid
/dev/mmcblk0p1: SEC_TYPE="msdos" LABEL="boot" UUID="22E0-C711" TYPE="vfat" PARTUUID="4bad8776-01"
/dev/mmcblk0p2: UUID="202638e1-4ce4-45df-9a00-ad725c2537bb" TYPE="ext4" PARTUUID="4bad8776-02"
/dev/sda1: LABEL="segate-dash" UUID="0EEB5BXXXXXXXX" TYPE="ntfs"
/dev/mmcblk0: PTUUID="4bad8776" PTTYPE="dos"

Next activity was to setup the file server. For this I needed very basic HTTP Server of showing the list of files and a basic service of uploading some files. And to expose this server via ssh tunnel I used the instructions given in http://priyabgeek.blogspot.in/2016/08/raspberry-pi-experiment-ssh-reverse.html

For the file server I used one of my projects https://github.com/bobquest33/gofileserver. You can download it using git and install the golang from the binaries at https://golang.org/dl/ and download the latest ARM version of go binaries. As the scope of how to install go and compile the above project is out of scope of this blog I will cover it in a different post or leave you to explore it for your self. Finally what you get is a file server. Now its not mandatory that you use my approach you can also use your own approach as well.

What I did however was to first mount the formatted hard disk to the below path:

sudo mkdir /mnt/usbdrive
sudo mount /dev/sda1 /mnt/usbdrive
ls /mnt/usbdrive
Then pointed the gofileserver to the given path /mnt/usbdrive and added it to crontab:
@reboot nohup sudo /home/pi/code/gofileserver/gofileserver :8001 /mnt/usbdrive & 
Now this setup is subjective and you can do a better job but this is what I felt as the best option given the circumstances.

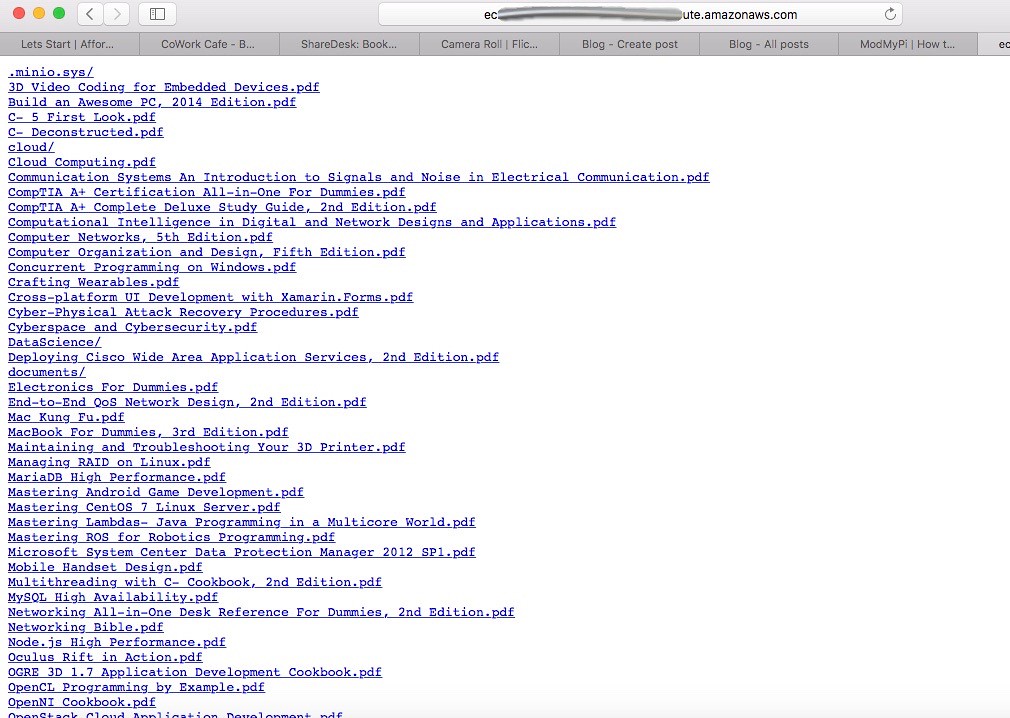
And finally I was able to see the files:

Screen Shot 2016-12-26 at 11.53.33 PM

Now for most of the cases it works fine and I am also having a interface where I can upload the files but that is still work in progress and I am trying to fix. But at the end what matters most is that where ever I am I am getting a read only version of my file which is great. Now the only thing I want to do next it to add https support and more user friendly UI which I will take as my future project.

Coming to the issues, one of the biggest issues which I faced was if I try to use a file upload program like scp or html multi-part file upload the file upload is fast but the server hangs. Also some times the server goes offline. Now I do not know if this is because of the NTFS driver or some other reason. But as a start now I can access my files from anywhere and use it.

If you have any better suggestions of feedback please do comment below.

Tuesday, December 13, 2016

Hadoop experience


I get call from many recruiters where they ask for 4-7 years experience in Hadoop for a technology that just started in 2010 and just picked in 2014 how can people demand such high experience and that to for the role of a developer.

It is in this context I strongly feel that recruiters should also do some background work for a role and skills needed before blindly cold calling people for roles. Even if they ask someone that will also help. Many recruiters have called me and some even ask about what's the expected experience and I do help. The companies and the recruiters should be realistic about the skills and experience that is required should be prepared for skill enhancement and training.

Unlike other skills big data skills are ever changing and need constant update and the technologies are irrelevant in months not even years hence realistic and a new approach to big data hiring is needed with focus on aptitude and skill development than throwing cash.

Raspberry Pi Experiments: Running Python3 , Jupyter Notebooks and Dask Cluster - Part 2

Its been a while since I posted my last post but had planned for this a while back and completely missed it. In this part of the blog I wil...